

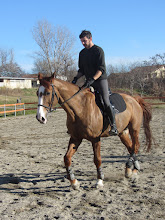
It completes the set composed by this bridle and this collar breastplate.

It's the first girth strap I make and it's a long time I wait to attempt. The principle is the same I've used on the breastplate: the green skin is too thin for whole padding (and I feared in an odd result, too), so I kept it only for the color accents, much more protected from wear.

Detail of the 1" stainless steel buckles stitched on 1" 1/4 elastic band.

Here's a detail of its back, too.

Making this had been fun and very instructive: I started from the main body, made out from panel hide and neoprene. During the cutting session I had to consider how produce a nice and effective cutout shape.

Then I applied the padding, my usual neoprene foam sheet, keeping borders free from that so I could stitch them together in a nice way.

After preparing the 4 buckles coupled with elastic band, I made the green details and glued them together with the center stap and assembled all the parts using green thread, as on other items from this set. Once finished, I stitched the two pentagonal "tops" and, voilà! My first girth strap is done!


No comments:
Post a Comment