My latest problem, unraveled yesterday:
I'm not very conversant with harnessing and my customer didn't tell me much about it, but I think it's an harness saddle with torn tug's loop (? please, correct me if I'm writing silly stuff).
I began with splitting top, with frame and terrets, from pad. They're stitched together like a saddle's seat and pad are and thread was already seriously worn out, insomuch as I could see the steel frame.
I don't what's the average quality of this kind of tack, but this looks like a nice artisan-made piece.
After unscrewing terret's and "small saddle" nuts, I split iron from leather...
... then I slipped off brass parts too.
Finally I've been able to unstitch the torn loop. "Artisan made but anyway machine stitched", I haughtily point out.
I love machine stitching, or better, I hate them but i love to unravel them: you pul a thread and le voilà... with handmade saddle stitching luckily (or unluckily, your choice) is not that simple.
On the base of the old torn loop I made a new one, using Sedgwick shoulder leather. And no, once again, I'm not colour-blind. Sometimes you need to have faith...
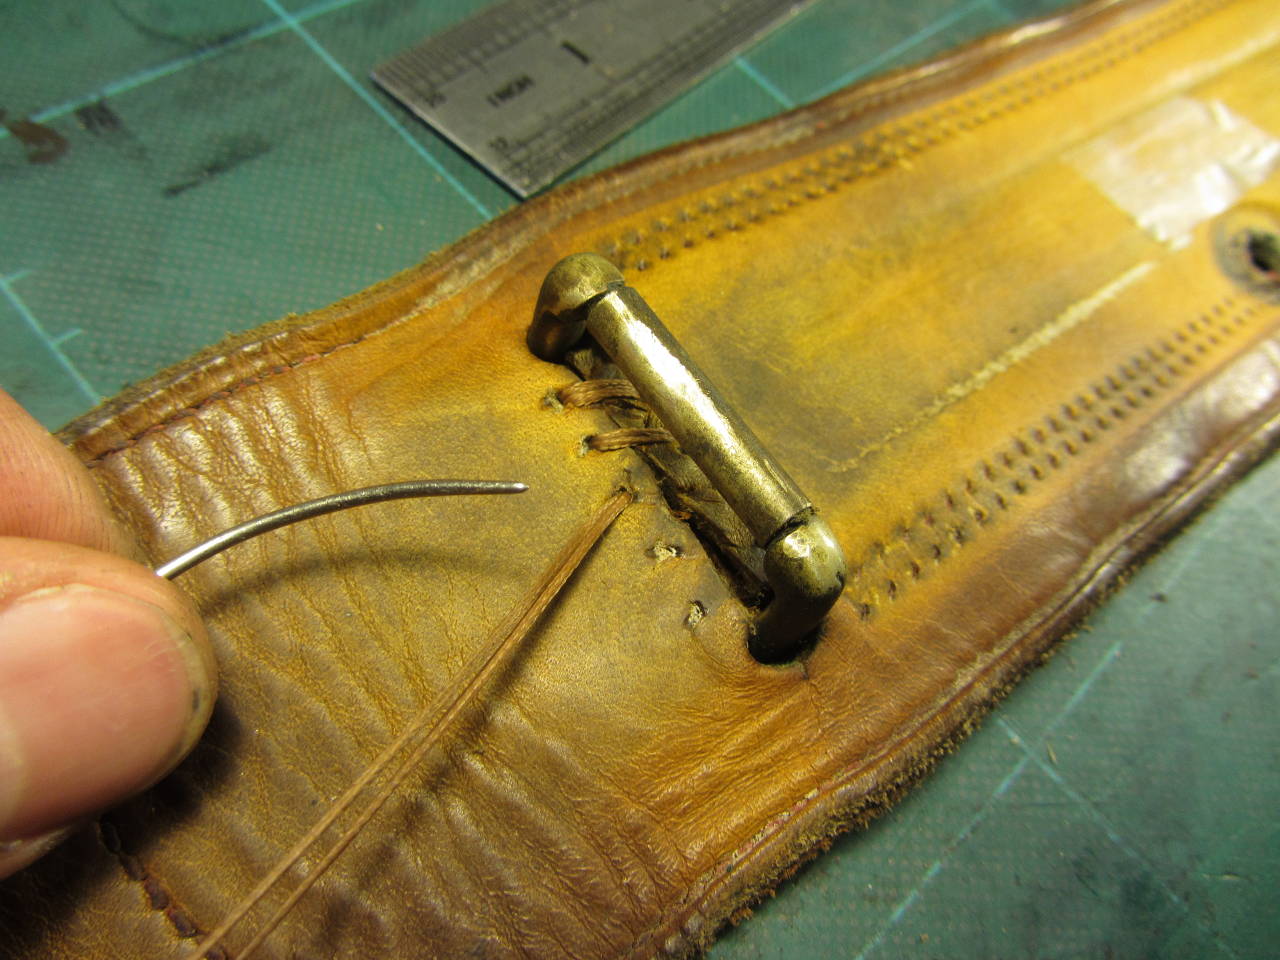
Before re-stitching the leather loop and after cleaning old stitching holes from old threads, I stitched the two brass rollers: one of them had been torn away when the accident occured, while the other one's thread simply wore out with time and regular use, but still in its place. I used strong braided polypropilene in place of the original linen thread.
Then I finally began to stitch the new loop. Handstitch, obviously, and using the old machine-made holes. I straightened the stitching lines too where they were bent... the joys of handstitching, you have total control on what you're doing.
Several hours and hundreds of awl strokes later, this was the result. The only thing left to do is to reassemble all...
...starting with brasses. I used my "classical" machine for making new holes, then I extended them with my little red cutter, the one you can spot here and there in these pics.
Here's the top part ressembled. Then I sewed the pad back on, using the best curved awl ever, the forged C.S. Osborne one. No pics of this last phase, about one and a half hour of intense meditation... obviously, no further holes added to the old ones, and one unique sewing thread (poly braid). Around 3 meters in total.
As always, miracle of miracles, neatsfoot oil heals any colour-blindness.
After several hours, as the oil got fully absorbed, new leather looks very close to the original one.
Total duration of this repais was 7 hours, in the while I had a cup of Taylors of Harrogate's Earl Grey tea, a few chocolate cookies and Strauss's Rosenkavalier on live radio from Firenze.
At 10 PM I finally had my dinner. Intense but really instructive, even if I wanted to begin a new breastplate in place of this...


istruttivo non solo per te!!! grazie di condividere tanto sapere!
ReplyDeleteGrazie Peter, ma non è niente di "sapiente": in fin dei conti bastano solo un po' di curiosità e di coraggio, finchè non hai finito non sai mai quale sarà il risultato!
ReplyDelete